What is Serpentine Belt, when do we need to replace it?

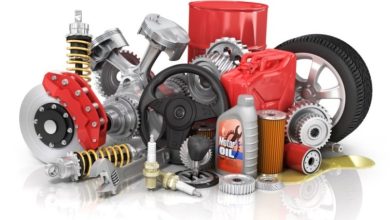
Don’t you hate it when you hear that squeal from under the hood? It usually means there is a problem with the serpentine belt. The serpentine belt takes some of the engine’s rotational force and transfers it through pulleys to other components. Things like the water pump-which cool the engine and alternator-which charges the battery, the air conditioning and the power steering pump are commonly driven by this belt. Over time, the rubber ages and gets weaker, eventually snapping. All pretty important parts. It is called a serpentine belt because it snakes around a bunch of engine components.
Serpentine belts are especially sturdy. They can last for years and go for tens of thousands of kilometres. But, with time they wear out. If the belt breaks while you are driving, everything will come to a halt within seconds. You have to stop the car or it will overheat, potentially causing major engine damage. And it probably won’t be at a convenient time or place. You might even need to get your car towed to an automotive service center. That is why manufacturers recommend a belt replacement on schedule. You really should get it done on schedule because a belt failure will definitely take you off the road.
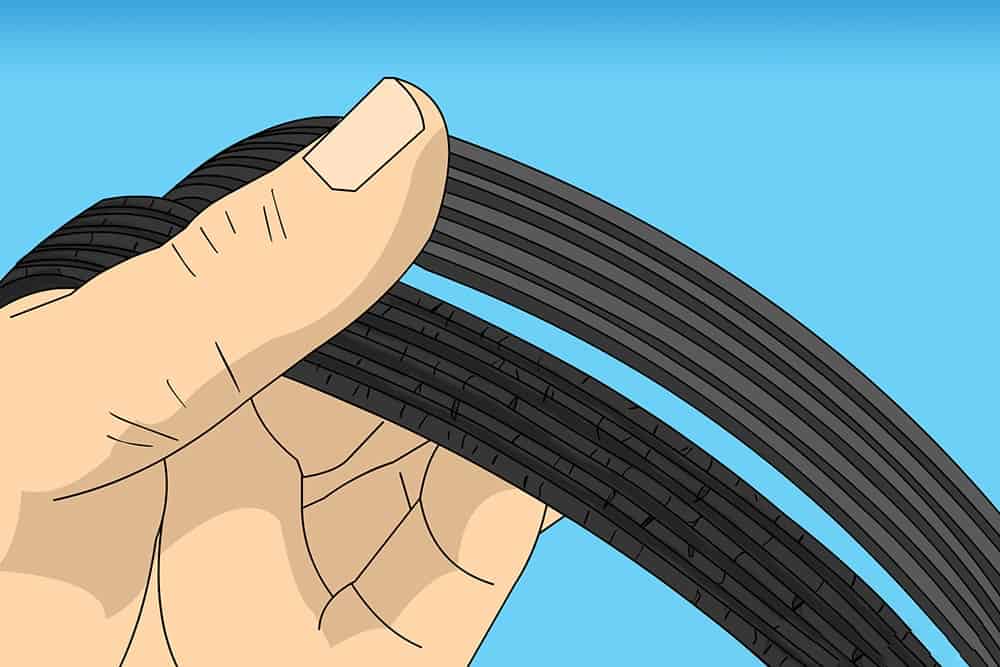
If you hear a squeal when accelerating or a slow, slapping sound at idle, you should have the serpentine belt looked at. Your mechanic will visually inspect the belt to see if it needs to be changed sooner than scheduled. If the belt has more than three or four cracks an inch, has deep cracks that penetrate half the depth of the belt, is frayed, is missing pieces or has a shiny glazed look, it needs to be replaced regardless of age or mileage.
Serpentine belt replacement is relatively cheap, especially compared with the cost and inconvenience of being stranded or getting a disabled vehicle to a service center for repairs.
Just remember, if your engine squeals in the morning when you first start it up, take a look at your serpentine belt under the hood. Any cracks, glazed areas, or visible threads mean that you need to replace it. Let it go too long, and your belt will eventually break -which can cause damage to your engine components.
An ounce of prevention is worth a tone of cure.
You Can Replace The Serpentine Belt By Yourself.
Part 1 of 2: Removing the old belt
Materials Needed
1- (⅜) inch ratchet
2- New serpentine belt
-
- Note: Most tensioners have a ⅜-inch drive that you slot into and pivot to relieve tension on the belt. Use a ratchet that has a long handle to increase your leverage. If the ratchet is short, you may not be able to use enough force to move the tensioner spring.
- Note: There are special tools available to make this job easier, but they are not always necessary. They can help when you need a lot of leverage or when there isn’t much space to fit a normal-sized ratchet.
Step 1: Let the engine cool down. You’re going to be working around the engine and don’t want to hurt yourself on any hot parts, so let the engine cool down for a few hours before starting the job.
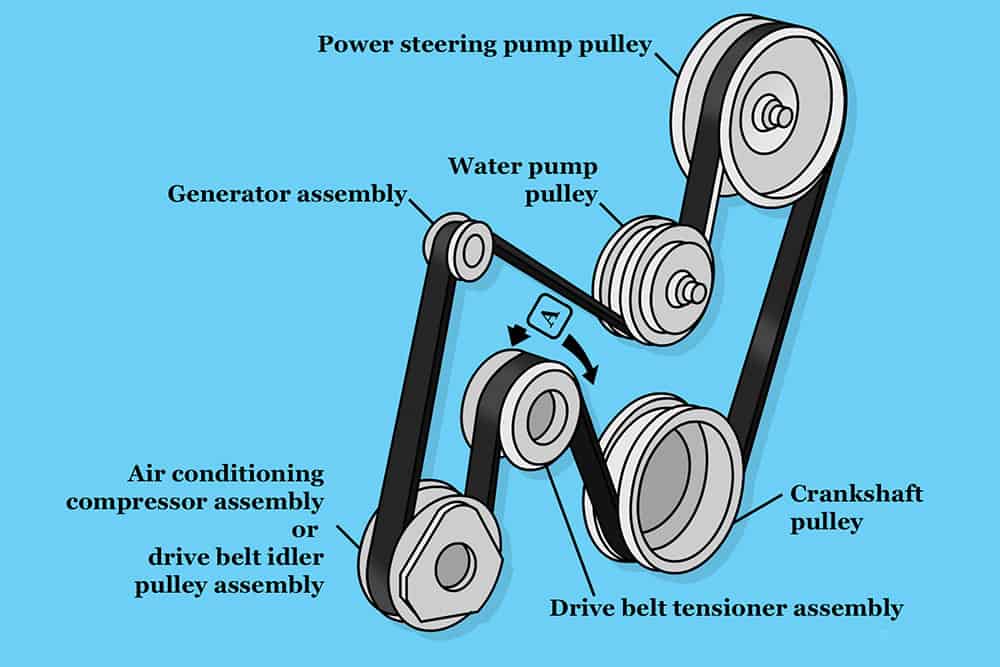
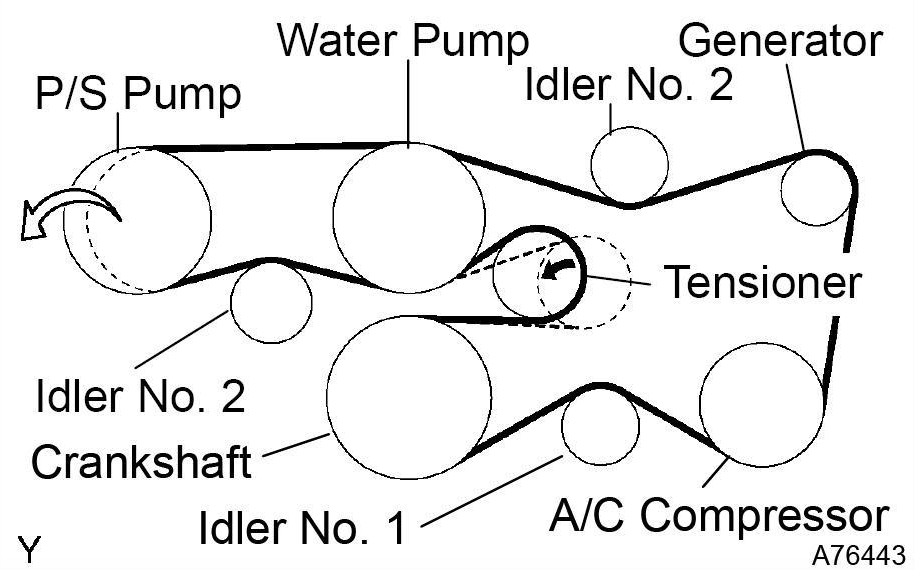
Step 2: Familiarize yourself with how the belt is laid out. There is usually a diagram towards the front of the engine that shows how the belt is supposed to loop through all of the pulleys.
The tensioner will usually be identified in the diagram, sometimes with arrows indicating how it moves.
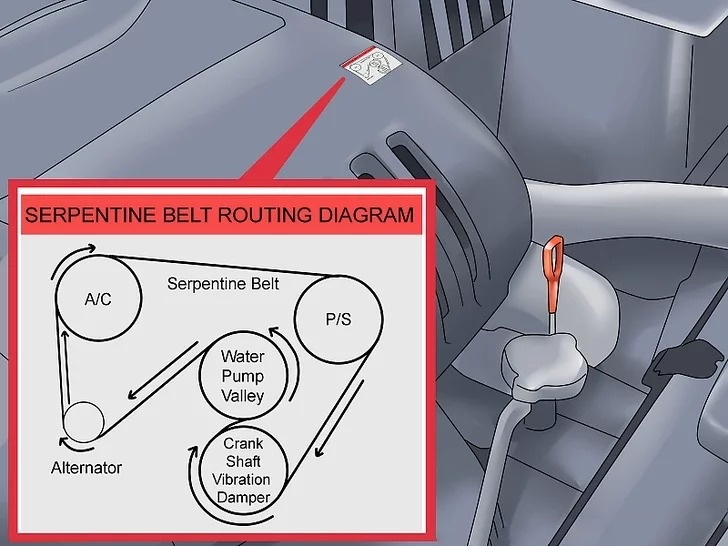
Take note of the differences between systems with and without an air conditioning (A/C) belt. Make sure you are following the correct diagram if there are multiple images for different engine sizes.
-
- Tip: If there is no diagram, draw a picture of what you see or use a camera to take pictures that you can reference later. There is only one way the belt is supposed to go on. You can also find the diagram online, just make sure you have the correct engine.
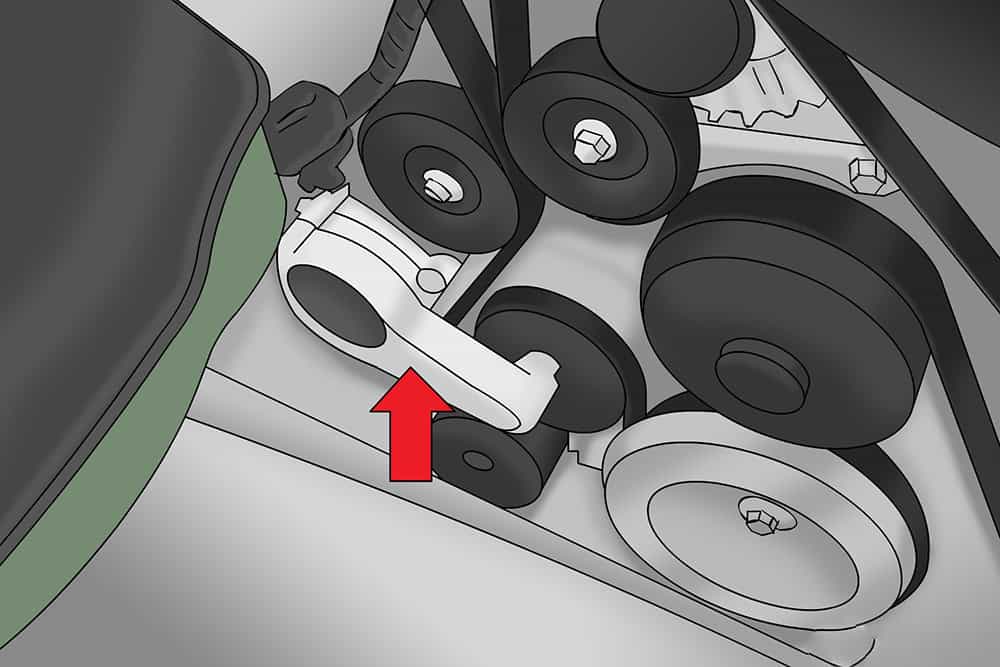
Step 3: Locate the tensioner. If there is no diagram, you can find the tensioner by pulling on the belt at various locations to look for the piece that moves.
The tensioner will typically have an arm with a pulley at the end that applies pressure onto the belt.
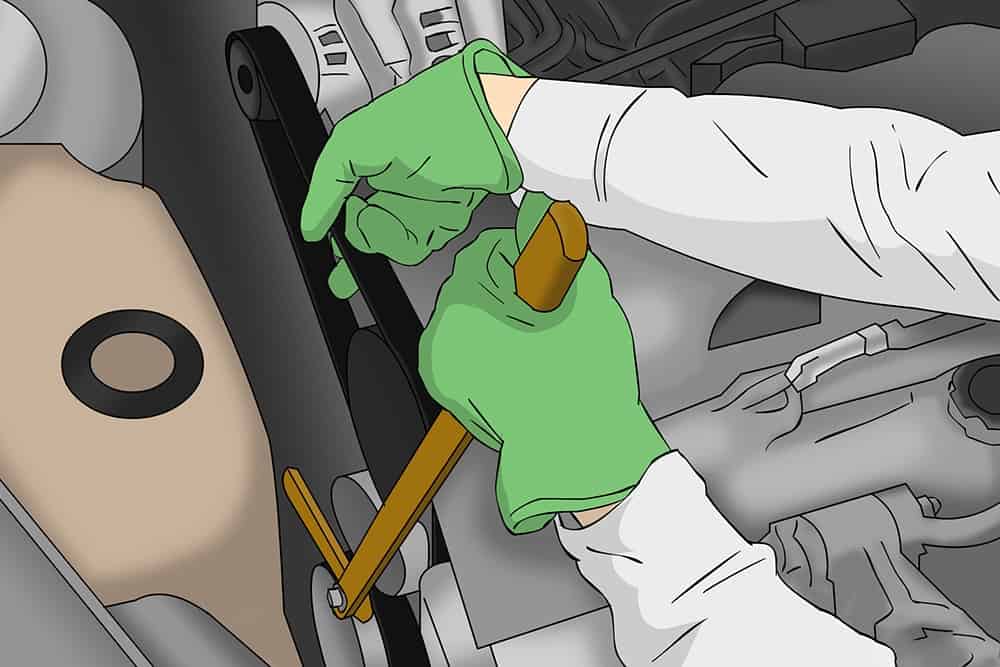
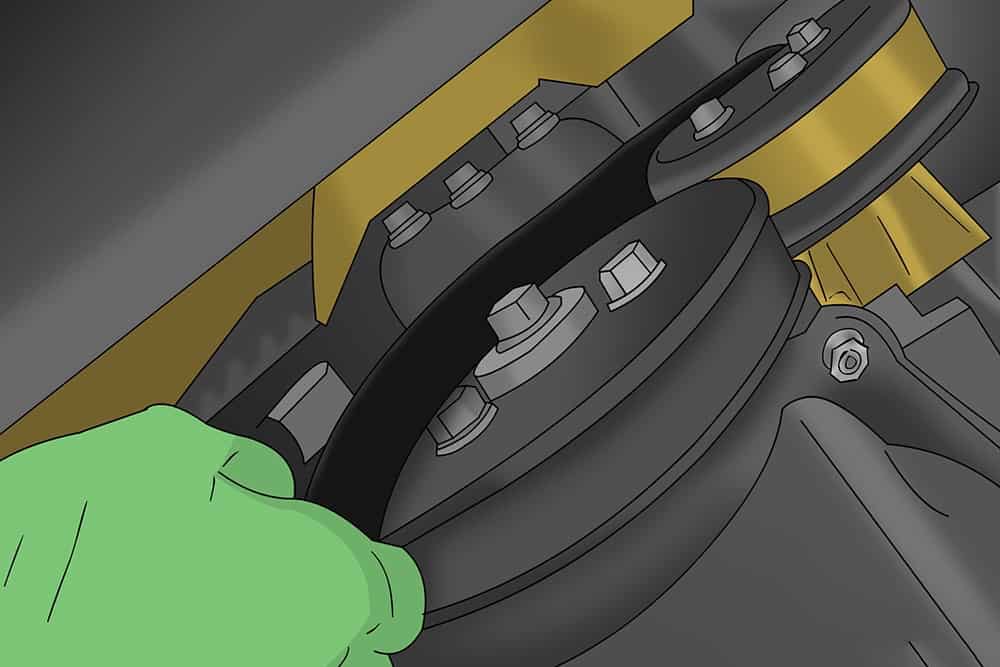
Step 4: Insert your ratchet into the tensioner. Pivot the ratchet to create slack in the belt.
Hold the ratchet with one hand and use your other to get the belt off of one of the pulleys.
You only need to get the belt off one pulley. Then you can slowly bring the tensioner to a resting position.
-
- Warning: Make sure you have a firm grip on the ratchet. Letting the tensioner slam can damage the spring and components inside.
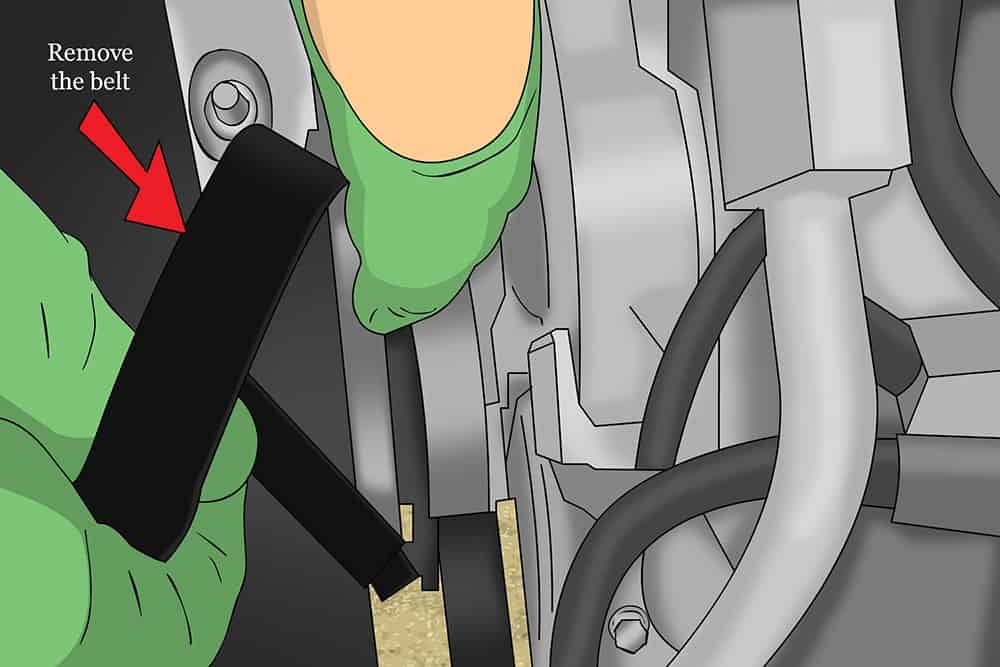
Step 5: Remove the belt completely. You can pull it up through the top or let it drop to the ground.
Part 2 of 2: Installing the new belt
Step 1: Make sure the new belt is identical to the old one. Count the number of grooves and pull both belts taut to make sure they are the same length.
Very minute differences in length are acceptable as the tensioner can make up for the difference, but the number of grooves has to be the same.
-
- Note: Make sure your hands are somewhat clean when handling the new belt. Oil and other fluids will cause the belt to slip meaning that you’ll have to replace it again.
Step 2: Loop the belt around all pulleys except for one. Typically the pulley that you were able to get the belt off originally will be the last one that you want to pull the belt over.
Make sure that the belt and pulleys are lined up correctly.
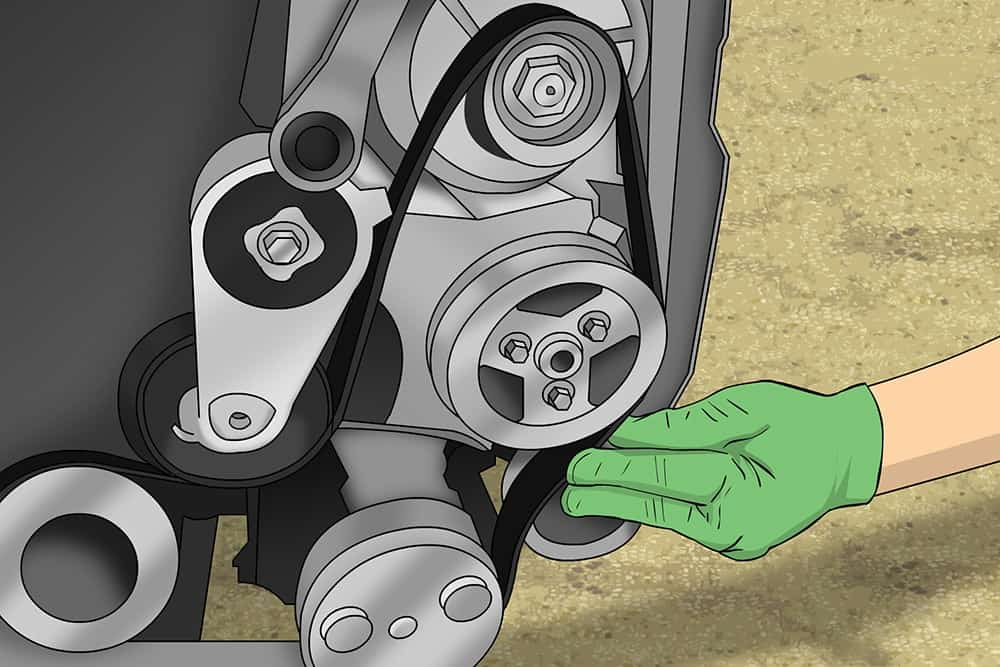
Step 3: Loop the belt around the last pulley. Pivot the tensioner to create slack and loop the belt around the last pulley.
As before, use one hand to hold the ratchet firmly while positioning the belt. Slowly release the tensioner so that you don’t damage your brand new belt.
Step 4: Inspect all pulleys. Before we start the engine, double-check and make sure that the belt is looped around correctly.
Make sure the grooved pulleys contact the grooved surface of the belt and the flat pulleys come in contact with the flat side of the belt.
Make sure the grooves are lined up nicely. Check that the belt is centred on each pulley.
-
- Warning: If the flat surface of the belt contacts a grooved pulley, the grooves on the pulley will damage the belt over time.
Step 5: Start the engine to test the new belt. If the belt is loose it will most likely squeal and sound like it is being slapped around while the engine is running.
If it is too tight, the pressure can damage the bearings of the components connected to the belt. It is rare for the belt to be too tight – but if it is, you will likely hear a humming noise without vibration.
With the serpentine belt replaced, you can rest assured that you will not be stranded in the middle of anywhere.